
Have you ever watched someone effortlessly glide across the dance floor and wished you could do the same? Well, guess what? You can!
In this article, we’re going to show you six simple steps to master the art of glide dancing.
From warming up and stretching your muscles to adding variations and style, we’ve got you covered.
So, get ready to impress everyone with your smooth moves as we guide you through the process of becoming a glide dance pro.
Let’s get started!
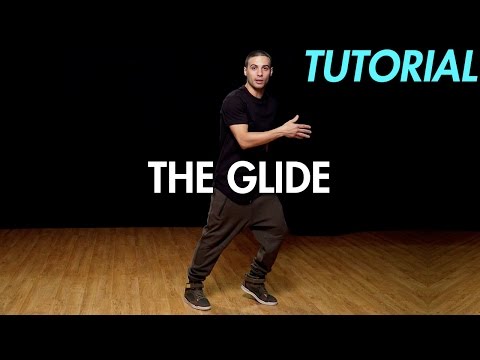
Related Video: "How to do the Glide (Hip Hop Dance Moves Tutorial) | Mihran Kirakosian" by MihranTV
Table of Contents
Key Takeaways
– Warming up and stretching before glide dancing is important to increase heart rate, loosen muscles, improve flexibility, and reduce the risk of injuries.
– Mastering the basic glide involves focusing on smooth and fluid footwork, using the balls of the feet to glide effortlessly, maintaining even weight distribution and steady pace, and mastering transitions between glides.
– Adding variations and style to your glide can be achieved by exploring unique glide variations, personalizing glides with personality and flair, incorporating spins, jumps, and intricate footwork patterns, and showcasing individuality through body movements, arm placements, and facial expressions.
– Styling techniques for glide include enhancing the routine with body rolls and arm movements, coordinating arm movements with glide steps for fluidity and flow, experimenting with different arm positions and gestures, and personalizing the routine with unique arm positions and gestures.
Step 1: Warm up and Stretch
First, you should warm up and stretch before attempting to glide dance. This crucial step prepares your body for the movements and helps prevent injuries.
Begin with some warm-up exercises to increase your heart rate and loosen up your muscles. Try jogging in place, jumping jacks, or even a brisk walk. These activities will get your blood flowing and increase your body temperature.
Next, move on to stretching. Stretching helps improve flexibility, which is essential for glide dancing. Start with a gentle full-body stretch, reaching your arms overhead and bending forward to touch your toes. Then, focus on specific areas of your body, such as your legs, hips, and back. Perform stretches like lunges, calf stretches, and spinal twists. Hold each stretch for about 20-30 seconds and remember to breathe deeply as you do so.
The benefits of stretching are numerous. It increases your range of motion, allowing you to execute glide dance moves more fluidly. Stretching also helps prevent muscle imbalances and reduces the risk of strains or sprains. Additionally, it improves posture and enhances body awareness, which are crucial for maintaining balance and stability during glide dancing.
Step 2: Master the Basic Glide
Once you’ve got the hang of the basic glide, try adding some stylish variations to your moves. To truly master the art of gliding, it’s essential to perfect your footwork and transitions. These techniques will elevate your dance and make it more captivating to watch.
When it comes to footwork, focus on keeping your movements smooth and fluid. Glide effortlessly across the floor, using the balls of your feet to propel yourself forward. Ensure that your weight is evenly distributed and maintain a steady pace throughout.
Transitions are what truly set a skilled glider apart from the rest. Practice seamlessly transitioning from one glide to another, incorporating spins, turns, and jumps for added flair. Pay attention to your body positioning and make sure each transition flows naturally into the next.
Remember, mastering gliding techniques takes time and practice. Start by breaking down the movements and practicing them slowly. Gradually increase your speed and intensity as you become more comfortable.
Don’t be afraid to experiment with different variations and incorporate your own personal style into your glides. This will make your dance unique and showcase your individuality. With dedication and perseverance, you’ll soon become a master of gliding, captivating audiences with your smooth footwork and seamless transitions.
Keep practicing, and soon you’ll be gliding with confidence and style.
Step 3: Add Variations and Style to Your Glide
Now that you’ve mastered the basic glide, it’s time to take your skills to the next level by adding unique variations and stylish techniques.
Explore different ways to glide, such as incorporating spins, jumps, or intricate footwork patterns, to create your own signature moves.
Personalize your glide by infusing your own personality and flair. Show off your individuality through your body movements, arm placements, or facial expressions.
Unique Glide Variations
There are several unique glide variations that you can incorporate into your routine to take your glide dance skills to the next level. These advanced glide techniques will add flair and style to your performance. Check out the table below for a quick overview of some of the most popular glide variations:
| Glide Variation | Description |
|---|---|
| Moonwalk | Sliding backwards while appearing to walk forwards. |
| Airwalk | Lifting one foot off the ground and gliding on the other foot. |
| Side glide | Gliding sideways with smooth and fluid movements. |
| Spin glide | Incorporating spins into your glide routine for added excitement. |
| Twist glide | Adding twists and turns to your glide for a dynamic effect. |
To learn how to master these unique glide variations, be sure to check out glide dance tutorials online. These tutorials will provide step-by-step instructions and helpful tips to help you perfect your technique. So why wait? Start practicing these advanced glide techniques and impress your audience with your smooth moves!
Styling Techniques for Glide
To add extra flair and style to your glide routine, try incorporating techniques like body rolls and arm movements. These styling techniques not only make your glide dance visually appealing, but also improve the fluidity of your movements.
Here are some techniques to enhance your glide routine:
– Body Rolls:
– Start with a slight bend in your knees.
– Slowly roll your spine from the top, allowing each vertebra to move sequentially.
– Coordinate the movement with your glide steps for a seamless transition.
– Arm Movements:
– Extend your arms gracefully, parallel to the ground.
– Move them in sync with your glide steps, emphasizing the fluidity and flow.
– Experiment with different arm positions and gestures to add your personal touch.
Personalizing Your Glide
Add your own personal touch by experimenting with unique arm positions and gestures, bringing a sense of individuality and creativity to your glide routine. Personalization techniques are key to creating your own glide style.
The way you move your arms can completely transform the look and feel of your glide. Try extending your arms out to the side, with your palms facing down, for a sleek and elegant look. Or, bring your arms closer to your body and bend your elbows slightly for a more relaxed and casual vibe.
Don’t be afraid to get creative with your gestures too. Incorporate waves, spins, or even finger snaps to add flair to your glide. Remember, the beauty of glide dancing is that it allows you to express yourself, so have fun and let your personality shine through in your movements.
Step 4: Learn Transitions and Footwork
Once you’ve mastered the basic moves, it’s time to dive into learning transitions and footwork for a seamless glide dance experience. Transitions and footwork are essential elements in improving flow and precision, as well as adding complexity and creativity to your dance routine.
Here are some key points to keep in mind:
– Smooth Transitions: Transitioning between different moves is what gives your glide dance that effortless flow. Practice moving from one step to another with grace and fluidity. Focus on maintaining a constant rhythm and maintaining control of your body.
– Footwork Variations: Experiment with different footwork patterns to add variety and interest to your dance routine. Combine basic glides with turns, spins, and slides to create unique sequences. Remember to keep your movements precise and synchronized with the music.
– Creative Transitions: Don’t be afraid to think outside the box and add your own personal touch to transitions. Mix different styles of dance or incorporate freestyle moves to showcase your creativity. Use your imagination to create seamless connections between different elements of your routine.
Step 5: Incorporate Upper Body Movements
Now that you have mastered the footwork and transitions in glide dancing, it’s time to take it up a notch and incorporate upper body movements. Upper body coordination is crucial in creating smooth transitions and adding flair to your glide dance routine.
To achieve smooth transitions, it is important to synchronize your upper body movements with your footwork. This will create a seamless flow as you glide across the dance floor. By coordinating your arms, shoulders, and torso, you can enhance the overall aesthetic of your performance.
One way to incorporate upper body movements is by adding arm extensions and waves. As you glide, extend your arms gracefully in different directions, creating fluid lines and shapes. You can also incorporate shoulder rolls and body isolations to add dynamic movements to your routine.
To better illustrate these upper body movements, here is a table that breaks down some popular glide dance upper body techniques:
| Upper Body Movement | Description | Example |
| Arm Extensions | Extend arms gracefully in different directions | Extend arms out to the sides while gliding |
| Waves | Create fluid lines and shapes with arm and hand movements | Perform a wave motion with your arms as you glide |
| Shoulder Rolls | Roll your shoulders forward or backward in a smooth motion | Roll your shoulders back while transitioning between glide steps |
| Body Isolations | Isolate specific parts of your body, such as the chest or hips, for added flair | Isolate your chest by moving it in a circular motion while gliding |
Incorporating these upper body movements will elevate your glide dance routine and make it more visually appealing. Remember to practice these techniques slowly at first, and gradually increase your speed as you become more comfortable. With dedication and practice, you will master the art of upper body coordination and create smooth transitions that will impress any audience.
Step 6: Practice and Perfect Your Glide Dance Routine
To really refine your glide routine, it’s important to devote regular practice sessions to perfecting your upper body coordination and transitions. Here are some key points to consider:
– Focus on synchronization: Pay attention to the timing and fluidity of your movements. The upper body should seamlessly complement the gliding steps. Practice keeping your arms relaxed and in sync with the rest of your body.
– Master transitions: Smooth transitions between different moves are crucial for a polished glide dance routine. Practice transitioning from one step to another with precision and grace. This will enhance the overall flow of your performance.
– Incorporate variations: Experiment with different upper body movements to add creativity and style to your glide routine. Try using arm waves, body rolls, or even simple hand gestures. This will make your performance more visually appealing and captivating.
Remember, perfecting your glide dance routine requires repetition. The more you practice, the more comfortable and confident you will become. Set aside dedicated practice time each day to focus on refining your upper body coordination and transitions.
With consistent effort and dedication, you will soon master the art of glide dancing. So, keep practicing and enjoy the journey of perfecting your glide routine!
Frequently Asked Questions
How Long Does It Take to Master the Glide Dance?
To master the glide dance, it’ll take some time and practice. But don’t worry, with effective learning techniques and dedication, you’ll be gliding like a pro in no time. Keep at it!
Are There Any Specific Shoes That Are Recommended for Glide Dancing?
When it comes to glide dancing, the right shoes can make all the difference. Look for lightweight sneakers with flexible soles to help you glide smoothly. Avoid heavy boots or shoes with sticky soles.
Can Glide Dancing Be Performed on Any Type of Surface?
Yes, glide dancing can be performed on various types of surfaces. Different styles of glide dancing exist, such as the moonwalk. It’s important to find a smooth and clean surface to ensure a smooth glide.
Is It Necessary to Have Previous Dance Experience in Order to Learn the Glide Dance?
No previous dance experience is necessary to learn the glide dance. In fact, our beginners’ guide breaks down the steps into simple, easy-to-follow instructions. You’ll be gliding across the dance floor in no time!
Are There Any Specific Health Benefits Associated With Glide Dancing?
Glide dancing offers numerous health benefits, enhancing physical fitness. The smooth movements improve coordination, balance, and flexibility. Additionally, it increases cardiovascular endurance, strengthens muscles, and promotes overall well-being. Get ready to glide and reap the rewards!